Showing posts with label Datapower. Show all posts

Thursday, December 11, 2014

Datapower XQuery replace


One of the clients that I’m working for discovered a problem with a SOAP web service querying an LDAP. The service could contain a ‘*’ in plain text in possibly different fields in the message. When the service is called it uses the ‘*’ as a wildcard. The system should handle the ‘*’ as plain text so we need to escape the character with ‘\2a’ 
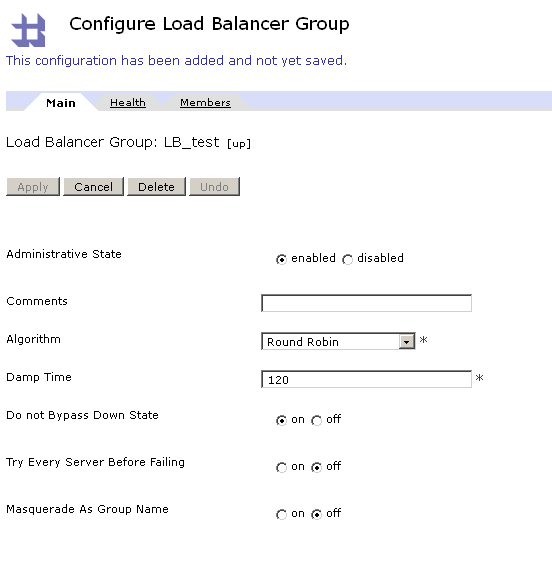
(escape for a LDAP filter query). So they looked in complete web service chain where the least impact was. They decided that an update in the DataPower configuration was the best option.

This is a small message example, but the ‘*’ can occur in couple different WSDL operations and in different fields.
<soap:Envelope xmlns:soap="http://www.w3.org/2003/05/soap-envelope"
               xmlns:tem="http://tempuri.org/">
   <soap:Header/>
   <soap:Body>
      <tem:FindUser>
        <tem:UserName>KMe_*</tem:UserName>
      </tem:FindUser>
   </soap:Body>
</soap:Envelope>

I immediately thought to use the function str:replace(). But unfortunately it is not supported in Datapower, which brought me to XQuery, as an alternative for XSLT. So this is the solution that I developed.

Because the replacement is only necessary for 3 operations from the WSDL I defined the policy-rule on WSDL operation level.


Below the XQuery code used to replace the ‘*’ into ‘\2’a. The XQuery can be extended to handle other values that need to be escaped for example:  ( ) \ / NUL

xquery version "1.0";
declare namespace local = "http://example.org";
declare function local:copy-replace($element as element()) {
  element {node-name($element)}
               {$element/@*,
                for $child in $element/node()
                return if ($child instance of element())
                       then local:copy-replace($child)
                       else replace($child,'\*','\\2a')
               }
};
local:copy-replace(/*)

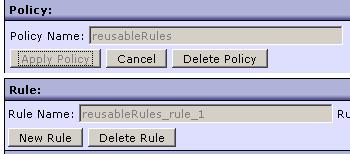
The total number of requests that have a ‘*’ or other wildcards in the username is limited. To improve the performance I adapted the standard SQL-injection filter to search for ‘*’ and output the number of hits. This way when the hit count is 0 I can skip the XQuery transform action.

Author: Kim

Saturday, June 22, 2013

Basic scheduling on IBM Datapower

Performing scheduled actions is not the primary architectural purpose of the Datapower SOA Appliances, but sometimes it might come in handy to be able to perform a certain ‘batch’ task on a scheduled timing.

As an example we take the situation at one of our customers, where a Datapower box is used as a proxy to add a security layer to the calls going to an external party.

Part of this security layer is the addition of a secure code, that must be retrieved with a call to a security server. This code stays typically the same for a long time and is the same for all calls going through the proxy.

To avoid making a call to the security server for each call that goes through the proxy, a scheduler was created that picks up the secure code every 60 seconds and stores the code in a global Datapower variable. The normal proxy calls simply use the value of this global variable to get the secure code.

- First thing we need for a scheduler is the action that will be executed. This action is defined in a processing rule with all the necessary processing actions in it.

- The scheduling itself should be done through an xml manager. On the page of your xml manager, go to the tab ‘Scheduled Processing Policy Rule’ and simply add a new rule with your selected processing rule and the interval in seconds.

As you see, it’s a very easy but limited (only fixed seconds intervals) feature on the Datapower appliance. In a few minutes you can create a simple scheduler, which is often just what you need.

When you need a more advanced scheduling process, you should consider using cron on unix or the task scheduler on windows and send a request to the service on Datapower that you want to schedule.

Author: Tim

Wednesday, December 5, 2012

Setting up an intelligent load-balancer group in IBM Datapower

The Datapower appliances offer a lot of functionality, but not all configuration options have clear documentation. In this blog I’ll present a typical setup for an intelligent Load Balancer Group.   

What we want to achieve in this setup is an intelligent load balancer that can do fail-over, but that excludes the members which are known to be in 'down' state from these fail-over tries.
In case none of the members is considered ‘up’, we want an immediate error-response and no extra waiting times for retries to backends that will probably fail. One of the reasons for such an approach might be that we want to isolate problems with a specific backend and make sure our Datapower appliance is not affected by a huge number of open connections (e.g. due to to a very high load and a relatively large time-out value). If the amount of open connections keeps on rising we will eventually reach the boundaries of the appliance and start receiving out-of-memory errors...


First of all a short explanation on the different states of a member of the load balancer group:  
- ‘up’: this is the default state of a member of the load balancer when it is added, but this state can also be reached when a member that was ‘down’ succeeds a health check. 
- ‘down’: this state can be reached when a health check on this member failed or when the member is manually disabled. 
- ‘softdown’: aka dampened, when an actual request reaches a connection error, the state of the member that caused the error is set to ‘softdown’ for a period specified in the ‘damp time’.

Healthcheck
After adding the members to the load balancer group we are going to add a health check. The default health check sends an empty soap-request and validates the received response against the entered xpath. Since the default xpath is ‘/’ the health check will be valid if any xml-response is received.
 

One option needs some extra attention: the ‘Timeout’ value. This value represents the amount of seconds before the health check fails with a time out. However, since the health check request is done using a user agent object, in reality the time out of the user agent is the one that is used.

Main load balancer group settings

The options that need some extra clarification here are ‘Do Not Bypass Down State’ and ‘Try Every Server Before Failing’.
- ‘Do Not Bypass Down State’: This property should ensure that when all members of the load-balancing group are down and a new request for that group is made, no attempt will be made to connect. However you should note that the load balancer is only behaving like this when this property is set to ‘On’ AND the property ‘Try Every Server Before Failing’ is set to off.
- ‘Try Every Server Before Failing’: As stated above, this property overrules the ‘Do Not Bypass Down State’ when it is set to ‘On’. The Datapower help-file will tell you the following:
This text is a bit confusing, since in reality we observed the following behavior: not only dampened and healthy members, but also unhealthy members are tried. This can cause some serious problems in case of time-out errors on multiple members, since each member adds this time-out to the total execution time... When this property is set to ‘Off’, the behavior observed is that in case of a failed connection attempt, the next member in state ‘Up’ is tried.

For the intelligent load balancer that we want to create we need to set the property ‘Do Not Bypass Down State’ to ‘On’ and the property ‘Try Every Server Before Failing’ to ‘Off’ as can be seen in the screenshot below.
Conclusion
With only a few configuration steps we can create an intelligent load balancer. The load balancer actively executes health checks with SOAP-calls and maintains a list with the status of its members. When a connection error occurs during an actual call from a client it automatically retries to make a connection with one of the known healthy members. When no member is ‘Up’ the call will directly fail and therefore prevent an exponential rise of open connections in case of a high load.


Author: Tim

Tuesday, November 29, 2011

How to use drag-and-drop for creating a reusable processing rule in IBM Datapower

The basic method of creating a reusable processing rule is by dragging the cursor over a part of the existing processing rule. For a very small group of actions this is fine. If you want to make the rule a bit more advanced you probably want to create the processing rule from scratch. This can be achieved by creating a ‘Call processing rule’ action and create the reusable processing rule starting from there.

The problem with this approach is that you cannot use the Datapower drag-and-drop interface you use for all other processing rules. The GUI presents you the same view you get for all processing rules in the ‘Objects’ menu. It lists the different actions, but that’s it. No overview of the used contexts on mouse-over, or other details of the actions besides their name.

A simple solution to overcome this problem is to create the reusable rule in a Multi-Procotol Gateway Policy.
Go to the page ‘Multi-Protocol Gateway Policy’ by following the link in the menu on the left (Services>Multi-Protocol Gateway>Multi-Protocol Gateway Policy).
Create a new policy that will contain all future reusable rules. In my example I called it ‘ReusableRules’.
You can open this policy and add as much rules to it as you like. For the match action you can pick any existing match (f.e. all (url=*)). This match is only used in this policy. When calling a processing rule from within another rule the match action is not used.
 

To call this processing rule from within the ‘Call processing rule’ action you just have to select your newly created rule in the dropdown-box as you can see in the screenshot below.
 
Author: Tim